Product categories are a way to group similar products together. They can help customers easily find what they are looking for and can also help you organize your inventory. Subcategories can be used to further divide products into more specific groups.
For example, in a clothing store, the main category might be “clothing” and subcategories could include “t-shirts”, “hoodies”, and “pants”. This allows customers to easily browse through different types of clothing and helps the store owner keep track of their inventory.
How to add/edit product categories
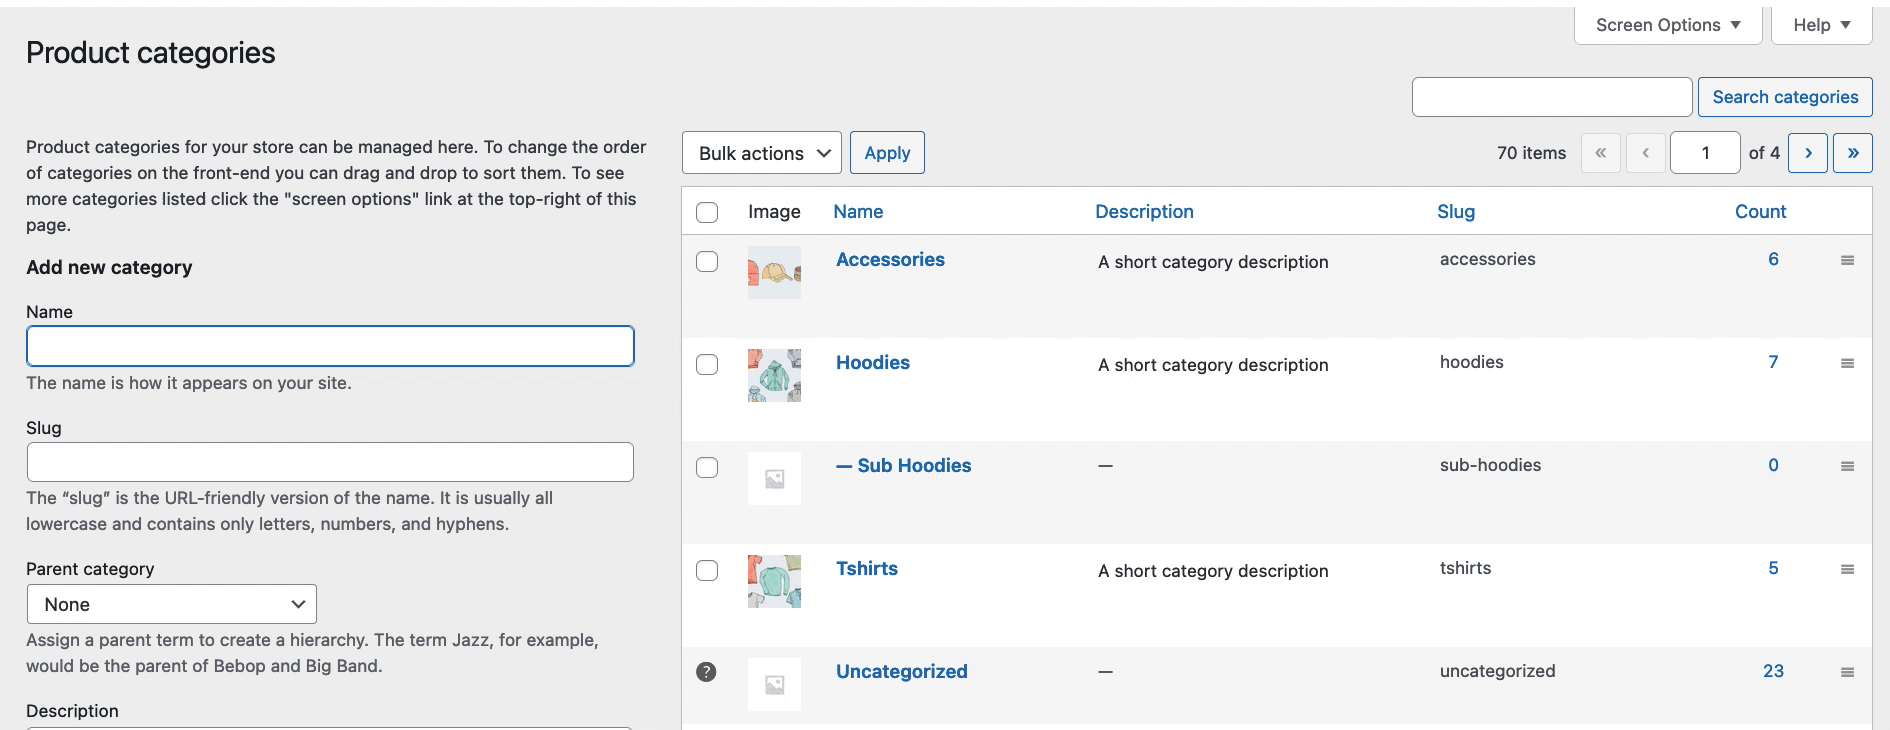
Categories are managed from the Products > Categories screen.
You can add, delete, and edit product categories.
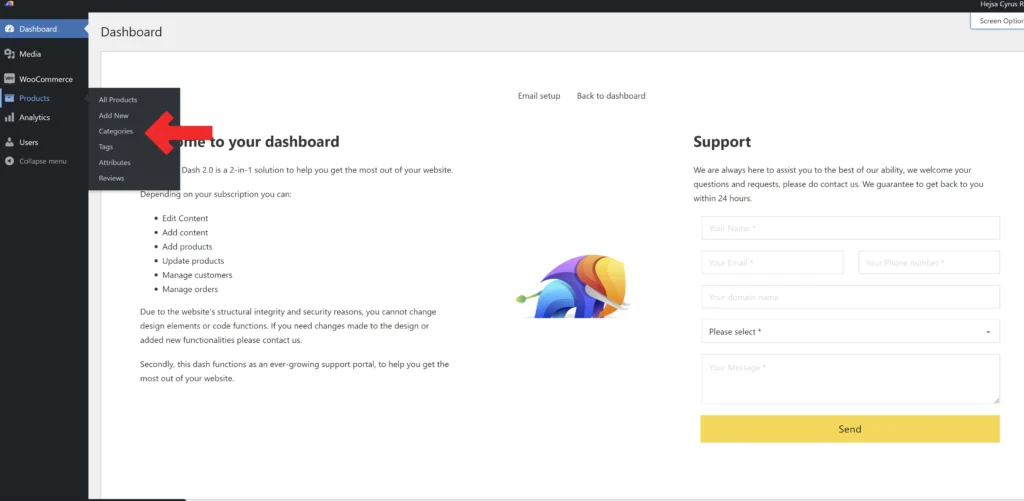
- Hover over or click on products in the menu
- Select add new Categories
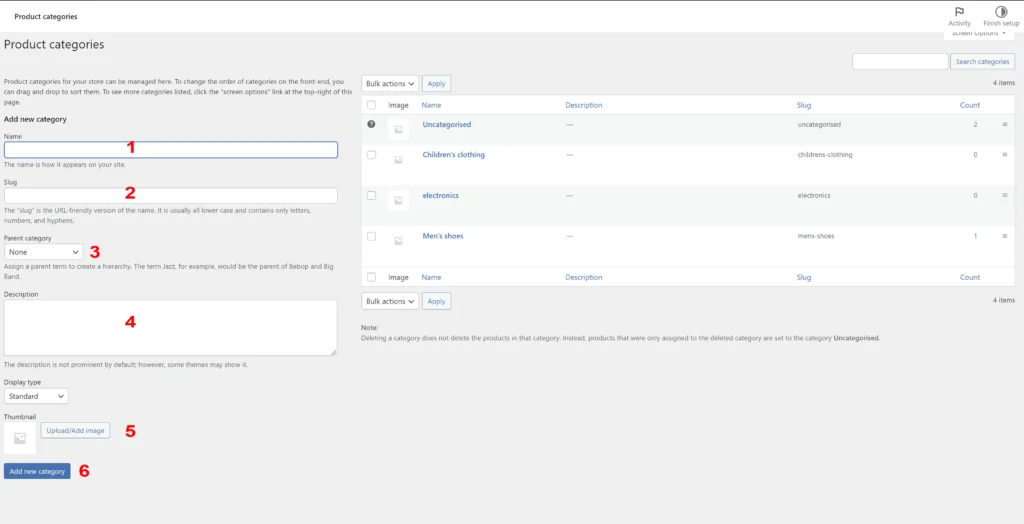
- Type in the Category name
- You can leave the slug empty
- If your category is a top-level or parent category, leave the field as “None.” If your category is a subcategory, select its parent category from the dropdown menu.
- Although writing a category description is optional, it is advisable to do so. A well-written category description can help visitors understand the purpose and contents of the category, and may also improve the visibility of the category in search results.
- Although uploading a category image is optional, it is strongly encouraged. A category image can help visitors quickly identify and understand the contents of the category, and can also make the category more visually appealing. Consider choosing a relevant and attractive image to represent your category.
- Click Add new category and you are done!
You can rearrange your categories by dragging and dropping them into the desired order. This order will be used as the default when the categories are listed on the front end, whether in widgets or on product pages in the category/subcategory views.